Thursday, January 28, 2010

pork shoulder in a crockpot

For Gail, learning the crockpot love! :)

***
When I had a surfeit of fennel greens, a friend suggested I try this (oven roasted pork shoulder with fennel tops). And so I waited for a sale on the meat, and today I made it!

Pork is supposed to cook to 170 degrees (though you can take it out earlier because it'll heat up at least another 5 degrees before cooling).

I didn't really want pulled pork, and all the recipes I could find were for that and for very long temperatures. In my crockpot (which runs hot), after about 6 1/2 hours, the meat was about 185 degrees. Good bye trichinosis!

Honestly, the flavor does not amaze and astound me, and the smell of the fennel tops got noxious. And as I just took a bite I remembered: I don't really like pork. Oh yeah. So I will probably slather it in a BBQ sauce and eat on rice with vegetables, and life will be fine - and next time I'm inspired to cook pork, hopefully I'll look back here and remind myself I DON'T LIKE PORK! Or at least I will remember how long it needs to cook.

***
*pork shoulder (called Boston butt - reverse-euphemism?) - mine was 4.2 pounds
*add any vegetables you'd like. I had a bunch of fennel tops chopped coarsely which I mixed with some olive oil, salt, and pepper, then spread over the pork.

Put in crockpot - NO LIQUID NEEDED (really, Tiff!). It creates its own liquid, which I will strain and defat and freeze to use in the future.

Cook on low until it smells done (should have checked at 5 1/2 hours but I thought that was too early).

Let cool, remove bone and fat, shred if using for pulled pork. (And if doing BBQ pork, shred and then put back in the crockpot with BBQ sauce to cover, and let cook on low another hour or so.)

Wednesday, January 27, 2010

oatmeal pancakes

Super duper yummy! Very filling, hearty, tasty. Also NOT low-fat, so not a regular thing!

From here. I halved it and that worked very well.

2 cups rolled oats
2 cups buttermilk (or milk with lemon juice: 2 T lemon juice, add milk to 2 c, let sit a few minutes)
½ cup all-purpose flour
2 Tbsp. sugar
1 tsp. baking powder
1 tsp. baking soda
½ tsp. table salt
2 large eggs, lightly beaten**
1/4 - ½ cup (1 stick) unsalted butter, melted but not hot (less works fine)
Vegetable oil or spray, for greasing the pan
Maple syrup, for serving

The night before:
Combine the oats and buttermilk in a medium bowl. Stir to mix. Cover and refrigerate overnight.

The morning of:
Take the bowl of buttermilk and oats out of the fridge. Set aside.

In another medium bowl, whisk together the flour, sugar, baking powder, baking soda, and salt. Set aside.

Add the eggs and melted butter to the oat mixture, and stir well. Add the flour mixture, and stir to blend. The batter will be very thick.

Warm a large nonstick skillet or griddle over medium-high heat, and brush (or spray) with vegetable oil. To make sure it’s hot enough, wet your fingers under the tap and sprinkle a few droplets of water onto the pan. If they sizzle, it’s ready. Scoop the batter, about a scant ¼ cup at a time, onto the pan, taking care not to crowd them. When the underside is nicely browned and the top looks set around the edges, flip the pancakes. Cook until the second side has browned.

Re-grease the skillet, and repeat with more batter. If you find that the pancakes are browning too quickly, dial the heat back to medium.

Serve hot, with maple syrup.

Yield: about 12 pancakes, or 3 to 4 servings

***
I learned two good cooking tricks growing up (yes, only two):
1. The best way to tell if something is finished cooking is by its smell
2. Don't flip pancakes until the bubbles have formed and burst.

Trust me - life is so much better if you just follow these very important rules.
*****
These are so tasty and satisfying that I decided to make them again the next week - but I'm not thrilled about all that butter. So I looked around the internet and it appears there are very similar recipes but with only 1-2 T oil listed, not a whole darned stick of butter. So next time I will try it with just 1 T and see how it works! I'm sure it won't be as rich, but it'll still have the satisfying texture.

** Once I decreased the butter, the egg taste really came through and that wasn't what I wanted. So next time I wonder ... if I just substitute 1/4 c milk for each egg, will that work? Hmm ...

Tuesday, January 26, 2010

beet greens, pasta, and pancetta

*pancetta or bacon (I used 5 very thin slices of pancetta, chopped into pieces, because that's what I had - would be better with thicker slices of pancetta)
*garlic, chopped (depends on how much you like it - I used 3 medium cloves)
*onion, chopped (not much - I used two slices of a red onion)
*beet greens, coarsely chopped (I used from about six medium beets), but if you use the stems (I definitely do), chop them more finely because they take longer to cook
*sundried tomatoes in oil, chopped (maybe 2 T)
*pasta (about 2 c cooked)

Fry the pancetta. It has enough fat that you need not add other oil.

Fry until it's crispy and remove if you can (I couldn't), then add onion and garlic and saute until it softens. Then add the sundried tomatoes if you like (they have oil clinging which is a good thing now) and stir it all up and let it saute over medium-low heat until the greens are cooked enough to no longer be bitter (unless you're like me, and you like them a little bitter when combined with the sweetness of the sundried tomatoes) and the stalks aren't too tough.

Add pepper and salt to taste (and a dash of balsamic vinegar if you like).

Stir in the pasta and eat. Top with freshly grated parmesan or other similar cheese.

***
Substituting beans for pasta would be a healthy choice, but I'm about beaned out right now and I was craving the heartiness of some pasta. I used whole wheat pasta elbows because that's what I had, but any such shape would be good.

I LOVE beet greens - they're like chard with a special treat - and I always feel like I've gotten a super good deal because I can use the beets AND the greens. And with sun-dried tomatoes, a flavor combination I stumbled upon this year, they are phenomenal.

I wouldn't make this every week, but it was a great taste treat!

Monday, January 25, 2010

broccoli winter slaw

I regularly read Gluten-Free girl; while I don't think I'm gluten-intolerant, I don't think it's healthy to rely too heavily on glutinous foods and so I try for a good variety. That is to say - I don't follow her baking advice, but her other recipes are fun.

Ever since she posted this winter slaw recipe, I've been wanting to try it. And today when I just could NOT stop being hungry I thought some roughage would help (and roasted beets and sweet potatoes will be a great second course). (What I probably need is more protein, but I'll live.) Besides, I needed to clear all the vegetables out of my refrigerator as an excuse to cruise by tomorrow's farmers market.

While I will never be a raw foods follower, I think it's good to get a variety of nutrients and some are best taken raw. And I was intrigued at the idea of raw brussels sprouts - and I do believe I like them better than cooked!

This is basically taken from her recipe above. I liked it ok, though I would choose the other broccoli salad I make if given a choice.

***

The Slaw

1 head broccoli
10 brussels sprouts
1/2 head cabbage (Napa, savoy, regular)
1-2 stalks celery

The Dressing

½ cup mayonnaise, fresh-made if possible
1 tablespoon Dijon mustard
1-2 tablespoons rice wine vinegar
kosher salt and cracked pepper to taste

Prepping the vegetables. Take off all the little florets of the broccoli head. Peel the outer layer (or not if it's not necessary) of the broccoli stalks and slice them in half lengthwise, then dice them (about 1/2-inch cubes). Remove the outer layer of the brussels sprouts. Cut each Brussels sprout in half. Slice the halves as thin as you can. Cut the cabbage in half. Remove the core and slice as fine as you can. Slice the celery down the middle, lengthwise, then dice the celery stalks the same size as the broccoli stalks (I do more finely because I'm not a big celery fan). Combine all the vegetables in a large bowl.

Making the dressing. Mix the mayonnaise, mustard, and rice wine vinegar. Season it with salt and pepper to taste. If you want the dressing a touch thinner, add a bit more vinegar or a smidge of water.

Finishing the salad. Coat the vegetables with the dressing. Season the salad to your taste.

Feeds 4.

Saturday, January 23, 2010

honey whole wheat bread

This is the very first bread I ever made - when I was about 12 years old I found it in the Mennonite More with Less cookbook and decided I would make bread. So, with no role model, I followed the recipe.

And it was FANTASTIC.

Since then I've made many other types of bread, but I keep coming back to this.

Bread is a great thing to help with stress: the kneading of the bread helps take the edge off my aggressive energy.

*Makes two loaves; bake at 375 for 40-45 minutes.

Combine:
3 c whole wheat flour
1/2 c nonfat dry milk (I don't add this usually - it's expensive!)
1 T salt
2 pkg dry yeast

Heat in saucepan until warm:
3 c water, whey, milk, or potato water (water that you boil potatoes in - it's yummy!)
1/4 - 1/2 c honey
2 T oil or butter

Pour warm (not hot) liquid over flour mixture. Stir well.

Add in:
1 additional c whole wheat flour
4+ c white flour, until the correct consistency

And make bread! (Knead at least 15 minutes; rise in warm place for 1-2 hours until doubled in bulk; punch down & knead a little; divide into two loaves, place in greased loaf pans and allow to rise until double in bulk.)

It's also great with wheat germ added and soy flour substituted for some of the whole wheat (I'm opposed to soy flour for nutritional reasons, but it gives a great crust). I've added various other things such as seeds and other flours. It's always great!

I just have to plug the cookbook - More-with-Less Cookbook: Suggestions by Mennonites on How to Eat Better and Consume Less of the World's Limited Food Resources. It was printed in 1976 - what's in vogue now, the Mennonites knew long ago. Now, some of the things in it I definitely wouldn't recommend now - such as using margarine. But it really shaped my concept of the world.

Thursday, January 21, 2010

harira


Harira - North African Vegetable Soup - served during Ramadan at iftar/breaking of fast, the national soup of Morocco (from Sundays at Moosewood Restaurant)

serves 6-7

1 cup finely chopped onion
garlic, minced
2 diced celery stalks
3 T oil
1 t turmeric
1 t ground coriander
1/2 t cinnamon (go easy on it - not too much!)
1/8-1/4 t cayenne (to taste - go easy)
1 small potato chopped
1 small carrot diced
4 small tomatoes chopped (I threw in a can of diced tomatoes)
1 cup tomato juice
4 cups vegetable stock or liquid from cooking chick peas or water
1 small zucchini finely chopped
1/2 cup curly vermiceli, crumbled (I couldn't find curly, so used angel hair pasta)
1 c. canned or cooked chick peas (I just threw in a can - 69 cents at Whole Foods!)
1/4 cup fresh lemon juice (I didn't use fresh, but it would be tasty)
salt & pepper to taste
****
Garnish:
chopped fresh parsley
fresh mint leaves
red bell pepper or pimiento strips
********
In a soup pot, saute the onions and celery in the oil until the onions are translucent. Add the spices, potatoes, and carrots and cook for 5 minutes, stirring often. Mix in the chopped tomatoes, tomato juice, and chick pea liquid/stock and simmer until all the vegetables are almost tender.

Add the zucchini and vermicelli and simmer for about 5 minutes longer. Mix in the chick peas, lemon juice, and salt and pepper to taste.

Garnish with chopped parsley, mint leaves, and strips of red bell pepper or pimiento.

*******
I think it would be way yum with cabbage, green beans, and small pasta such as orzo.

Freezes well.

Sunday, January 17, 2010

Mexican rice for a little crowd

Sadly, my childhood was bereft of culinary delights - unless you call tater tots, "cream of ..." soups, and canned vegetables delightful (I do not).

But there was something served in the school cafeteria I liked, and I spent years trying to recapture it - and this comes the closest!

This goes great with beans and other Mexican dishes to stretch the food dollar for a crowd.

***
*oil or butter
*1# bag of white rice
*garlic cloves, chopped
*onion, chopped
*cold water (1 1/2 times the amount of rice)
*can of diced tomatoes with chilies (generic Ro-Tel)
*small can of tomato sauce
*1 T ground cumin
*2 bouillon cubes (or just use broth instead of water)
*salt, to taste
(a little kick would be good - a jalapeno or two, or some cayenne)

Heat the oil/butter in a large pot over medium heat. Add the rice and stir it as it browns (don't have to stir a lot at first, but keep an eye on after it starts to brown). Add in the garlic & onion to saute them a little.

Then add in everything else, stir it up well, and then cover it with a lid. When it starts to boil, turn it to low, and let cook undisturbed for 20 minutes.

***
This makes quite a bit - probably 10 good servings depending on what else you're serving.

Friday, January 15, 2010

easy chicken enchiladas with salsa verde

From here. Extremely yummy!

Yield 4 servings (serving size: 2 enchiladas and 1 lime wedge)
Ingredients
• 1 cup chopped onion
• 1/4 cup chopped fresh cilantro
• 2 garlic cloves, minced
• 1 (7-ounce) bottle salsa verde (such as Herdez brand) (I used a 16-ounce bottle which was perfect)
• 2 cups shredded cooked chicken breast
• 1/3 cup (3 ounces) 1/3-less-fat cream cheese, softened
• 1 cup fat-free, less-sodium chicken broth
• 8 (6-inch) corn tortillas
• Cooking spray
• 1/4 cup (1 ounce) crumbled queso fresco
• 1/2 teaspoon chili powder
• 4 lime wedges
• Cilantro sprigs (optional)

Preparation
Preheat oven to 425°. Combine first 4 ingredients in a blender; process until smooth. Combine chicken and cream cheese in a large bowl. Stir in 1/2 cup salsa mixture. Reserve remaining salsa mixture.
Bring broth to a simmer in a medium skillet. Working with one tortilla at a time, add tortilla to pan; cook 20 seconds or until moist, turning once. Remove tortilla; drain on paper towels. Spoon about 1/4 cup chicken mixture down center of tortilla; roll up. Place tortilla, seam-side down, in an 11 x 7-inch baking dish coated with cooking spray. Repeat procedure with remaining tortillas, broth, and chicken mixture. [OR - just steam or microwave the tortillas and stuff them then - no broth nonsense to deal with.]

Pour remaining salsa mixture over enchiladas; sprinkle evenly with queso fresco and chili powder. Bake at 425° for 18 minutes or until thoroughly heated. Serve with lime wedges. Garnish with cilantro sprigs, if desired.
Nutritional Information
Calories: 327 (26% from fat)
Fat: 9.5g (sat 4.4g,mono 2.9g,poly 1.3g)
Protein: 28.5g
Carbohydrate: 31g
Fiber: 3.3g
Cholesterol: 78mg
Iron: 1.8mg
Sodium: 493mg
Calcium: 149mg

Green tomato cake

THIS IS SO YUMMY!! And nobody can guess what the mystery ingredient is. From here.

* 2 1/4 cups sugar
* 1 cup vegetable oil
* 3 eggs
* 2 teaspoons vanilla
* 3 cups flour
* 1 teaspoon salt
* 1 teaspoon baking powder
* 1 teaspoon cinnamon
* 1/2 teaspoon nutmeg
* 1 cup pecans or walnuts
* 1 cup raisins
* 2 1/2 cups diced green tomatoes
* coconut (optional)

PREPARATION:
Preheat oven to 350°. In mixing bowl, beat sugar, vegetable oil, eggs and vanilla until smooth and creamy. Sift together the flour, salt, baking powder, cinnamon and nutmeg; slowly beat into egg mixture. Blend well.

Stir in pecans, raisins and tomatoes.
Pour into greased 9x13-inch pan. Top with coconut if desired. Bake for one hour, or until a wooden pick or cake tester inserted in center comes out clean.
Serves 12+.

Monday, January 11, 2010

challenges

First, let me say hello to Aiva Jordin Yuen, who was born to "Gummy" on 1/10/10. Congratulations!! Y'all have many wonderful challenges ahead of you, and it will be fun to see how Aiva loves food too.

A far less consequential challenge in the cosmos are these bananas. Jamie cut them before the biggest freeze and there's a big bunch stalk of them in their house (which I posed with along with Ruby in full chef's regalia ... think I need that picture) and he sent me home with these. Eve says they are "Mexican bananas" but I find nothing on those on-line and I am not banana-savvy enough to distinguish from the on-line descriptions to see what other names they may have. She says they have a nice lemony flavor and are good in banana bread.

So, banana bread it shall be! But ... what else?? Bananas foster bread pudding - I had some of that a few months back and it rocked my world. I wonder how they would be in a raita.

Jackie Frost, if you're reading (though I know you're ill now), your culinary services are needed! Because truth be told, I haven't really eaten bananas for a couple of years. Almost all my produce is from the farmers market, and until they start selling bananas there I'm sitting fruity with satsumas and Pontchatoula strawberries.

So ... any ideas?

Sunday, January 10, 2010

orange yogurt

I picked up some incredible blood oranges at the Farmers Market on Saturday - they picked like mad before the freeze, and I don't know how much longer we'll see any citrus this year. I wanted to do something special with them, and I just made some yogurt, and as usual Ina Garten has good ideas! From here. It's super yummy - tastes like orange sherbet/vanilla ice cream without the chemically residue that leaves in my mouth. I omitted the honey (because it was all solid and I didn't feel like liquifying it), and that was fine, though it would also be good with! This feels like a special treat and would be great to serve at a brunch, etc.

Ingredients

  • 4 cups (2 pints) plain yogurt
  • 1/4 cup raisins
  • 1/4 cup coarsely chopped walnuts or pecans
  • 1 1/2 teaspoons pure vanilla extract
  • 1/4 cup good honey (or less)
  • 1 orange, zest grated
  • 1/2 to 1 cup freshly squeezed orange juice
  • Orange, orange zest, raisins and walnuts, for garnish (optional)

Directions

Line a sieve with cheesecloth or paper towels (or a tea towel) and suspend it over a bowl. Pour the yogurt into the sieve and allow it to drain, refrigerated, for 3 hours or overnight.

Place the thickened yogurt into a medium bowl and stir in the raisins, walnuts, vanilla, honey, and orange zest. Thin with orange juice until it is a desirable consistency. Garnish with sections of orange, orange zest, raisins, or walnuts and serve.

***

Truth: This stuff is like crack to me. It tastes like a creamsicle or an Orange Julius but without all that nasty chemical aftertaste. It is SO GOOD. I will not ever be taking it to a brunch because it would disappear long before I could get to my destination. Maybe it wouldn't be so magical without the blood orange, but DANG it's good now.

granola in the crockpot

Please note: all of the ingredients are highly variable. Don't want pecans? Don't put in pecans. Put in what you want! The advantage to using the crockpot is that it is less likely to burn than in the oven, and this uses less energy.

mix together:
5 c oats
1 c pecan halves
1/2 c whole almonds
1/3 c raw sunflower seeds
2 tsp cinnamon
1 tsp salt

combine:
1/4 c honey
1/4 c brown rice syrup (or more honey)
1/4 c butter melted (or coconut oil)
3/4 c applesauce
1 tsp vanilla

1 c dried fruit (to add after the granola is cooked)

Mix it up, put it in crockpot on low. It takes about 5-6 hours; stir it every 20 minutes or so (when you can smell it).

Let cool, add fruit, and store in airtight container. Great with yogurt and fruit!

pickled okra salsa

A friend who knows I'm an okra pickling fiend just sent this to me (from Jan 2010 Southern Living Magazine) and I'm super stoked to try it!

Pickled Okra Salsa
5 whole pickled okra, sliced
1/2 cup chopped sweet onion
4 tsp chopped fresh cilantro
1 tsp fresh lime juice
1/4 tsp salt
1/8 tsp. ground pepper
1 (14.5 oz.) can diced tomatoes with mild green chiles, drained
Pulse first 6 ingredients and half of tomatoes in a food processor 4 to 6 times or until thoroughly combined. Stir in remaining diced tomatoes. Serve immediately, or cover and chill. Store in refrigerator for up to 7 days. If refrigerated, let stand at room temperature 15 minutes before serving.
Makes 1 1/2 cups. Prep time: 10 min.

Saturday, January 9, 2010

oh crock pot how do I love thee, let me count the ways


I can wax poetic on slow cookers/crock pots ad nauseum. As y'all know. But SERIOUSLY, they are AMAZING. (Crock pot is just the Rival brand name for slow cookers. That's what I have - the 4 qt red, actually two of them (on one, I broke the crock - but I've super glued it back together and it holds pretty well, so when I really need two - I'm set). It runs a bit hot.)

I have no recollection of when I first discovered them ... there may have been one in the house when I was a kid but I don't think my parents ever used it. Never lived with somebody who used one really.

But at least since moving here, I have been a fiend. Right now, as you can see, I'm making yogurt and black beans (just threw everything in so it doesn't look like it!). Also this week I'll make chicken makhani and probably either black bean chili or tamale pie with the black beans. Stephanie O'Dea's website makes me feel more sane about my crockpot lovin' because she's over-the-top.

A crockpot can be a great tool to help reduce costs. Actually I think that's how I got so obsessed - I use it to cook the garbanzos to make my own hummus.

If I were at a job and away from home for 10 hours or so, I would definitely get a crockpot with a timer, because most things don't want to cook that long. But it's also great for making a big pot for the week on the weekends when home more.

But I was just thinking today, Gail, about how GREAT a crockpot will be for baby food down the road. Those little containers of baby food are ridiculously expensive, and they add all sorts of icky stuff to some of them (seriously, what baby needs SUGAR added to sweet potatoes? PLEASE!). But a crockpot can cook vegetables and fruits down to very soft, and wouldn't take much attention at all, and you could freeze portions (or can).

That can also be a problem - crockpots can make mush out of vegetables. Some vegetables are definitely better added late in the cooking. It's just a matter of figuring out what works for you. It's really good for cooking things that want a long, slow simmer time - like sauces and soups whose flavors richen with time. Also good for frozen meats - can just throw it in and let it cook all day.

Also, it seems that most things I can make in the crock pot, I can freeze portions for later. My freezer runneth over!

OK, there is so much crockpot joy for me to share, but there are other things I need to do today besides stare in awe and wonderment at them. I'm curious how other people use them - if there are uses I haven't thought of.

Friday, January 8, 2010

Indian butter chicken (chicken makhani)


This is definitely worthy of company! (especially if they are not on a strict fat regulated diet)

from here.

2 pounds boneless skinless chicken thighs (she says frozen solid is fine)
1 onion, sliced
6 garlic cloves, chopped
2-4 T butter
15 cardamom pods (or more - sewn together or in cheesecloth)
2 tsp curry
1/2 tsp cayenne pepper
2 tsp garam masala
an inch or so of fresh grated ginger
1 can coconut milk (I used light)
1 can (6 oz) tomato paste
2 T lemon juice
1 cup plain yogurt (to add at the end, I used nonfat)

Throw everything in (except yogurt), stir it up and turn it on. Cover and cook on low for 8 hours, or high for 4 (or less - with my hot crock).

Stir in plain yogurt 15 minutes before serving. Discard cardamom pods. Salt to taste, serve with rice. Roasted cauliflower is a great side!

***

NOTE: If only cooking four hours (3 1/2 was sufficient for the chicken), then the onions will be a bit crunchy. So, either cook longer or saute them first (probably preferable, though it destroys the whole "I can put this meal together in 15 minutes" vibe).

sweating vs. caramelizing

Video from CHOW here on sweating vs. caramelizing (wouldn't let me embed).

The secret? Cook longer for caramelizing. Medium heat for both, add salt from beginning - but (and this is key and what I wasn't sure about): you don't need to add any sugar to caramelize. The longer cooking brings out the natural sugars.

I just ate some roasted beets & sweet potatoes, and some of the bits were caramelized and HOLY MOLEY THAT'S GOOD! But the recipe I have calls for a bit of brown sugar - and I think I'll omit next time if it's unnecessary.

lemon poppyseed bread


(modified from a Horizon yogurt recipe that was once on-line but is no longer)

Combine:
1 c yogurt
2 eggs
1 tsp vanilla
zest from one lemon (~1 T)
1/4-1/3 c poppy seeds
1/4 c melted butter
1/4 c applesauce*

Combine in another bowl:
2 c flour (all purpose or whole wheat pastry or a combination)
1/2 c sugar
1 T baking powder
1/4 tsp salt

Then combine them and bake in a greased bread pan at 350 degrees for 50+ minutes. (The texture was a little strange - really thick.) (Usually 50 minutes works fine, but today it was still doughy in the middle when I pulled it out then - use the toothpick test to check for doneness: slide one in the middle and see if there's uncooked dough sticking to it. Crumbs are ok- pull it out. But goop and it needs more time.)

Let it cool a bit.

Heat together: juice of a lemon and 1 T sugar until sugar is dissolved.

Poke little holes in the cake with a toothpick and drizzle the glaze over it.

***
AWESOME texture! Soft. Not as lemony as I'd expect, but it's mild (probably because I use Meyers lemons). Freezes well.

*One of my fat-cutting tips is to replace half butter in any baked recipe with applesauce. It works well though it does change the texture, and it helps with the many jars of applesauce I still have left on my shelves from the saucing extravaganza Erin & I had last year. But if you don't want to use applesauce, it would be fine to use 1/2 c butter total.

Thursday, January 7, 2010

roast in a crockpot


(Yeah, the meat is there, hidden under the mushrooms.)

(When first cooked, it was fall apart tender. A night in the 'fridge firmed it right up [above].)


*roast (I used sirloin tri tip because it was on sale; I read chuck is good); mine was about 2.5 pounds (can use larger)
*vegetables (I used: 4 carrots, 1 onion, 2 stalks celery, 7 cloves garlic, 1/2 pound crimini mushrooms) (potatoes would also be good, or other sturdy vegetables)
*liquid (I used 1 c tomato juice and 1 c chicken stock from freezer, then added probably two more cups of water and a vegetable bouillon cube - and that was TOO MUCH LIQUID)
*herbs/spices (salt, pepper, bay leaves, oregano, basil, marjoram, thyme - or whatever you like!)

***
Sear the roast. Heat up a pan to pretty high heat with a high heat point oil such as peanut oil. Roll the roast in flour and kosher salt & freshly ground pepper. Place roast in heated oil until you can smell it browned, then turn over and repeat for all sides.

While searing, chop vegetables in chunks (I usually chop quite finely, but I leave in larger chunks for the crockpot - so they don't lose all shape). Place in bottom of crockpot. However, don't put in more delicate ones - the mushrooms I added later.

Place seared roast on top of vegetables.

Deglaze pan. Pour some of the liquid into the hot pan and use it to scrape up the flavorful bits from the bottom (the "fond"). I then added all liquid to heat to boiling to speed along the cooking process.

Pour heated liquid into crock and add herbs/spices.

Cook on low for about 5 hours (meat thermometer about 160 degrees for medium). (see below)

Add mushrooms and other delicates the last hour or so.

****
I'm on a big marjoram kick lately and think I should probably get a plant. I find it blends so well with so many things. I also am liking thyme, and still have some fresh sprigs so tossed those in.

For liquid, a lot of people use wine but I really do not like the taste of meat cooked in wine. Blech. And yes, I've tried a variety of wines and I always feel like I've just wasted perfectly good food by doing that. I also am not loving Worcestershire sauce, though that could be a nice addition. I think that most people would not put tomato sauce/juice/paste into a roast, but I like the mild acid and the flavor richness it adds (and if not using it, I would add some apple cider vinegar). Of course a lot of people would throw in onion soup mix and cream of mushroom soup, but I am most assuredly NOT those people. (You will NEVER see me cook with cream of anything soup because they most assuredly taste like crap. Trust me - I grew up in a household that went through cases of the stuff.) I'm trying to wean myself off bouillon, but as far as evils go the one bouillon cube for all that food - I'm not worried.

When I added all that liquid, I erred on the side of caution, and it ended up looking very much like soup. I will probably save the broth to cook rice with because it's very flavorful - but it is A LOT.

When figuring out how to cook a roast (never done it before in my life), I chanced upon a java roast recipe. It sounded intriguing, but my organic fair trade coffee is pretty expensive and I didn't want to waste it - plus, the idea of putting cream cheese into a saturated fat extravaganza of red meat - well, not really my thing. But if I have some extra coffee lying around in the future I might try it.

Regarding time: I guessed I would need more time than I really did. My roast was pretty small and my crockpot runs hot and I started it with boiling liquid - but when I checked it at 5 1/2 hours, the meat was well over 200 degrees. The vegetables were great texture then, carrots still a little firm. Didn't add mushrooms at end - will saute them tomorrow to accompany.

It turned out very tender, but a little on the dry side (probably because it was quite lean).

Would be awesome with mashed potatoes & gravy! Would also be good with a green salad or something fresh to balance this long-cooked food. I wanted to accompany it with roasted beets and sweet potatoes, but with the timing so off those will be dessert.

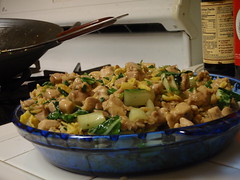
Yeah, since I didn't add the mushrooms to the roast because it cooked a lot faster than I expected, the next day I sauteed them and and then added some broth and let them cook down. YUM!!

Wednesday, January 6, 2010

Elaine's Snickerdoodle Cookies


Snickerdoodle Cookies
Originally uploaded by gummychild
Elaine gave me this recipe for my bridal shower a few years back, and though I've been wanting to try it, never got to it until today! Mmm, it's delicious! It makes a fragrant and soft cookie...just the way we like Snickerdoodles to be. =)

It's a sturdy basic recipe, but some recipes call for shortening. Like NolaOkra, I'm not a fan of shortening, but our reasons are different. My reason is simply that I've never used it before, and it looks kinda gross, hahaha...plus, plain ol' butter always seems to work best when it comes to baking. For me anyways. =)

Here's her recipe, with some of my own tips thrown in. ^_^

1. Cream 1 cup of softened butter with 1.5 cups of sugar. When well blended and fluffy, add 2 eggs and cream well.

2. In a separate bowl, sift 2 and 3/4 cups of all-purpose flour with 1 tsp. of baking soda, 1 tsp. of cream of tartar, and 1/2 tsp. of salt. Add this to the butter and sugar mixture, and mix well.

3. Roll the dough into logs about 1" - 1.5" thick and wrap with saran wrap. Refrigerate the dough for at least 2 hours. I think the reason for doing this is because we're not using shortening here, the cookies might spread too much, and it'd be too soft. Putting it in the fridge would allow it to be a little tougher so that it won't spread too much during baking. You can probably keep the dough refrigerated longer, and even freeze and defrost it in the fridge, which is what I'm going to do with some of this dough. I only made about a dozen cookies today, and the recipe says it can make 4 dozen!

4. Turn your oven on to 374 degrees F, and line your baking sheet with parchment paper. Take out your logs of dough, and cut them into thick coins so that you can roll them into walnut size balls.

5. Roll them into a sugar and cinnamon mixture. I used 1/4 cup of sugar mixed with 2 Tbsp. of cinnamon.

6. Place them onto the baking sheet, about 2 inches apart as they will spread, and bake for 8-10 minutes. DO NOT LET THEM BROWN! In my oven, 8 minutes was perfect for super soft cookies that were just done. Go for 10 minutes if you want a crisper Snickerdoodle (or longer, but I'd keep a good eye on it).

The wonderful thing about these cookies, besides its taste, is that it fills the entire kitchen and home full of sugar-cinnamony goodness, hee hee...I'm not a fan of straight-up cinnamon...but used in baking, I think I'm liking it more and more. =)

Tuesday, January 5, 2010

Fukien Fried Rice


Fukien Fried Rice
Originally uploaded by gummychild
As you know, I love making fried rice. =) It's healthy (really, we don't need that much oil, even if it's called "fried"), depending on what you put in it, and you can use up any leftovers that are sitting in your fridge. And it's tasty. =)

Today, I decided to make the Fukien-style fried rice, which is a "wet" fried rice. You know how you can order burritos regular, or wet? Well, fried rice (and noodles, like the Chiu-Chou style stir-fried noodles!) come in the same way. Basically, you have a very basic fried rice on the bottom, and top it with the ingredients that are usually in a nice and savory gravy sauce...the sauce leaks into all the cracks of each rice grain below, filling the entire dish with flavor. ^_^

The ingredients are all eyeballed again, so I'll do my best to guesstimate measurements for those that want to try it. Keep in mind though: cooking is based on how you like certain flavors, how much you want of this or that, and is pretty flexible, so feel free to go crazy and adjust to your own liking. =)


Ingredients Ready To Go!
Ingredients:

- 3 Chicken Thighs, deboned, and with the skin and fats removed.
- 1.5 Tablespoons of cooking wine
- Grated ginger (just about a teaspoon)
- 4 cloves of garlic, minced (I wanted more garlic flavor today)
- a handful of bok choy, cleaned.
- 2 eggs, beaten.
- handful of cilantro, rinsed and chopped up.
- 1 sprig of green onion, cleaned and diced.
- 2 cups of rice (cook this beforehand)
- 2 more eggs, beaten and set aside.
- Oil to stir-fry

*Optional: You can add other veggies, such as sliced shitake mushrooms, diced carrots, and dried scallops. Those would be some nice additional touches to the ingredients I used today, but again, fried rice is pretty flexible. Do what you want. =) As for protein, adding sliced pork, beef, shrimp, and even fish fillet or meatballs (the Asian kind) would work too.

Gravy Sauce Ingredients: (all eyeballed...)

- 1 cup of water
- 2 Tbsp of starch (I use tapioca starch normally, but cornstarch works just as well for those that don't have tapioca starch)
- 1.5 Tbsp of Oyster Sauce
- 2 tsp of light soy sauce

Directions:

1. Dice the chicken thighs, and marinade with cooking wine, grated ginger, minced garlic, and starch. Set aside.

2. Chop the box choy. I like to chop the stems about half an inch wide, and the leafy parts 2-3 times bigger. Set aside.

3. Take the 2 beaten eggs and make a thin pancake on a saute pan that's over medium heat. Flip when one side is done, and when the whole thing is cooked, remove the egg and cut it into thin strips. Set aside. You won't need the saute pan anymore; everything now goes on the wok.

4. Heat up the wok on high, and add the other 2 beaten eggs slowly in a circle, so that it forms something of a thin pancake. You might just add a little more than half of the eggs at first. Add your rice, and stir-fry the eggs into the rice; add the rest of the eggs as you cook so that it mixes and mingles well with the rice. The rice should look "golden" as the eggs coat each grain. =) If you find it gets a little dry on your wok, add some oil; I usually will add a few teaspoons (one ring around the wok with my oil cruet). Remove the rice and set into your serving platter.

5. While the wok is still hot, add a ring of oil and toss in your chicken. Have fun stir-frying! When using a wok, I always prefer to "hear" the cooking - the sizzling, the metal spatula sliding against the iron wok as it confidently flips over the food pieces - it shows me that real cooking is being done! Hee hee. ^_^


6. When the chicken pieces are about 3/4ths done, go ahead and add the egg strips, cilantro, and green onions. Mix them well, and as the chicken pieces are almost done, add in the bok choy and mix well.


Step #6a...


Step #6b...

7. Make your gravy in a separate bowl, and add into the wok mixture. Adjust your gravy as needed: more water to thin it out, or starch to thicken. You won't know whether you need to thin the sauce or thicken it until you see it cook and heat up with the rest of the ingredients, as the heat helps thicken the sauce.

8. When the entire mixture is heated through (look for bubbles all over the wok!) and as thick/thin as you like, dish it all up on top of the rice, and voila! Serve hot and fresh! ^_^

Look for bubbles throughout your sauce to know that everything is heated thoroughly!


Piping hot and ready to serve!

Saturday, January 2, 2010

not the best broccoli of my life


Winter is the season of roasting vegetables in my kitchen, and I'm seriously enamored with them all.

So today I thought I'd try broccoli, based on this recipe.

Meh.

Wasn't crazy about the lemon zest so didn't juice, and didn't add yet more olive oil or pine nuts. That's just too busy and I don't need all that fat (some fat, yes; a Greek village's daily serving of fat, no). I think most vegetables need one good spice, and I'll be experimenting to find what broccoli's is. Because there has to be something out there that goes SHAZAMM! like cumin with cauliflower does. Of course cumin is polyamorous and might also work well with broccoli.

And yes, my favorite parts are the burnt bits and edges ... and I know that they're carcinogenic, but I'm eating them with BROCCOLI AND CAULIFLOWER. Seriously - doesn't that cancel out?